
After you or a manager requested your access to BeyondTrust Remote Formerly known as Bomgar, we added your account to the access rights list. Now we need to get you logged into the Representative Console.
There are two components to BeyondTrust Remote. The Representative Console and the Client Portal. We need to get you the engineer or support person access to support the client.
Navigate to https://assist.exelaonline.com/login to be presented with the login page for BeyondTrust Remote.
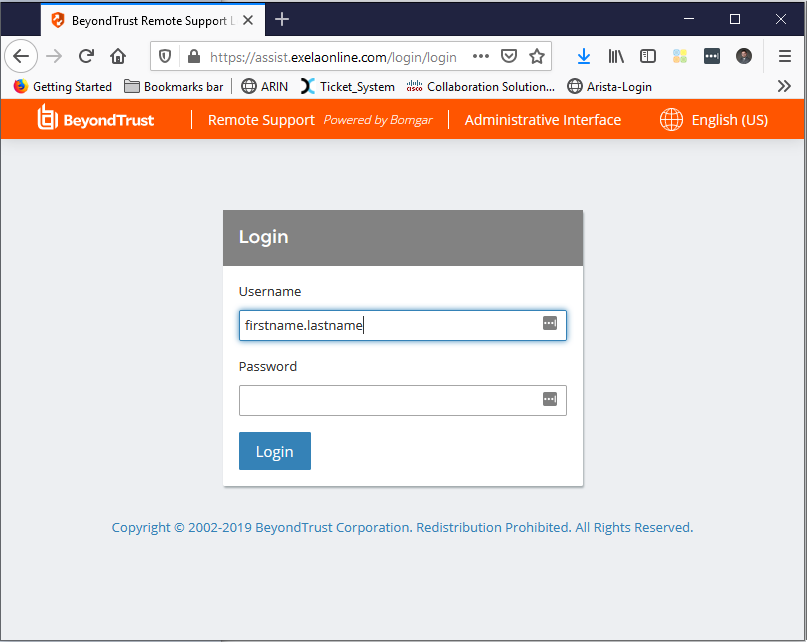
At the login screen you will need to enter your Username from the Exelaonline Active Directory and the password. If you do not know your password you can use the helpful links -> Exela Password Reset link above to reset your password.
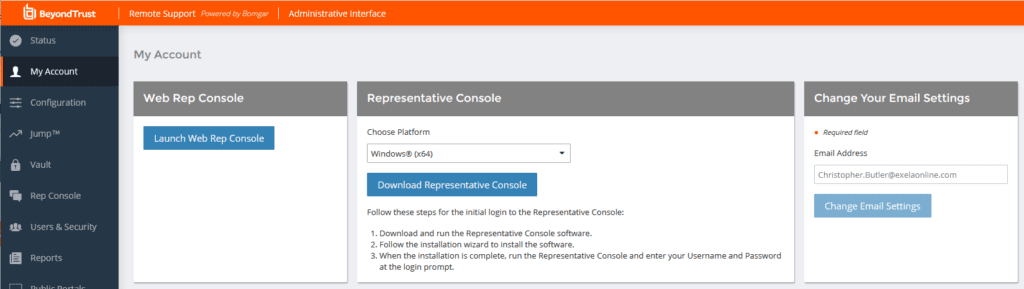
Downloading the Rep Console
When you have successfully logged in you will need to download the representative console. This is at the Center of the page
Connecting to the End User’s Machine
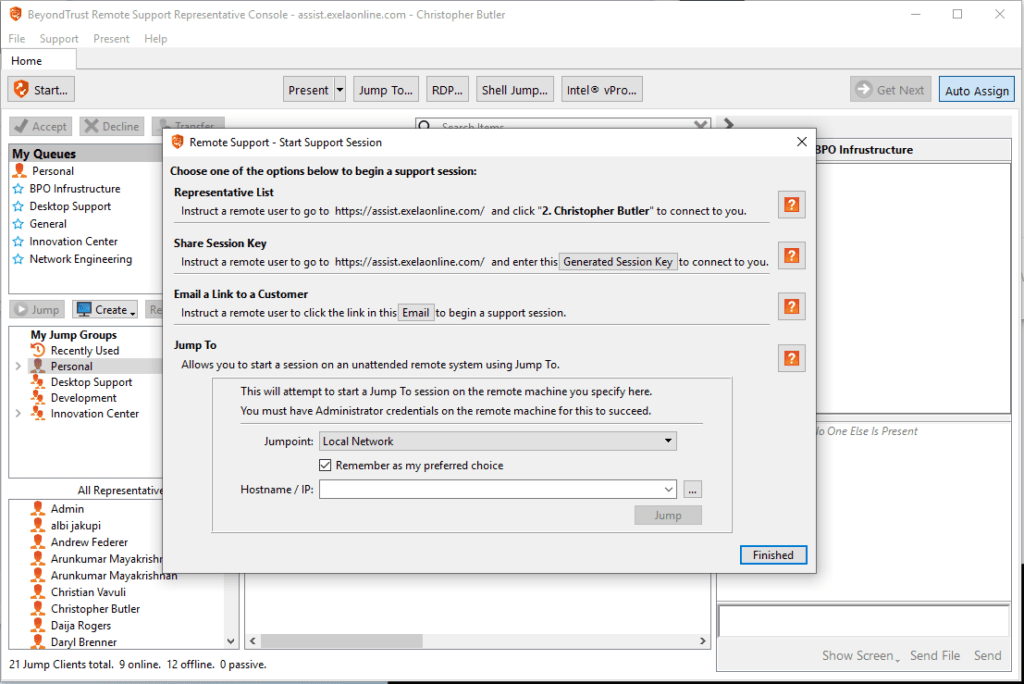
Once you have the Rep Console installed there are 2 easy ways to connect with the end user.
1.) You can ask them to goto https://assist.exelaonline.com and click on your name.
2.) You can send them an email from the Rep Console. We will dive into that now.
Depending on your group you may have additional or different options like Pinned Jump clients, Direct RDP access, or Intel vPRO access. This guide will focus on the most Common “Remote Support” proprietary access.
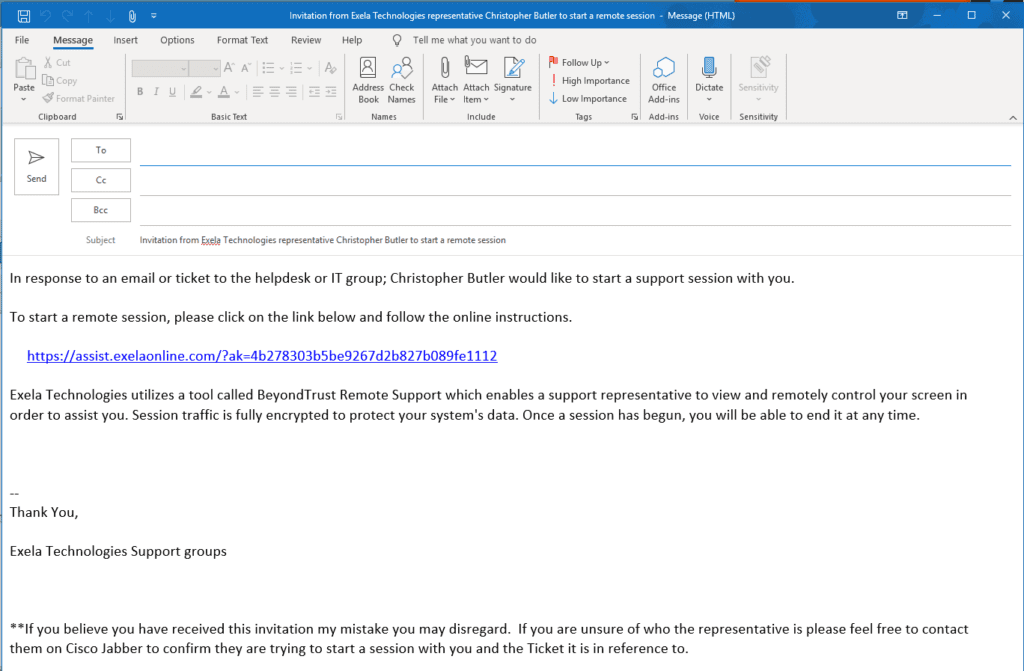
Once you have logged into the Rep Console, you will need to select Start in the top left. From there select email. This will open a populated email in outlook for you to add the end user’s email address to and send.
What the client has to do
Depending on the technical level of the end user you may need to walk them through connecting to you.
When the end user opens the email, they will click on the link and it will download a run-once app. They will need to run this app to initiate the connection to the server.
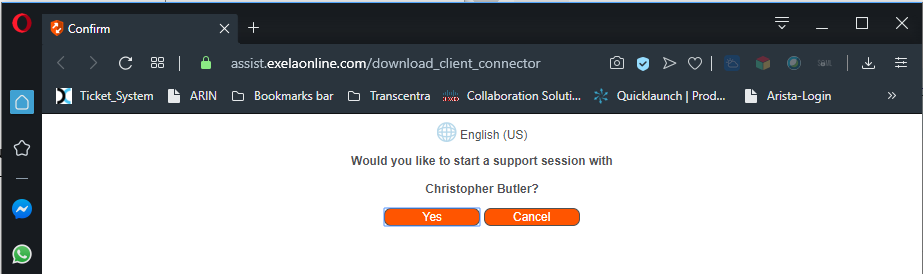
Clicking on the link will ask them to confirm they want to connect to you.
Depending on the browser they may need to save and then double click on the downloaded file.
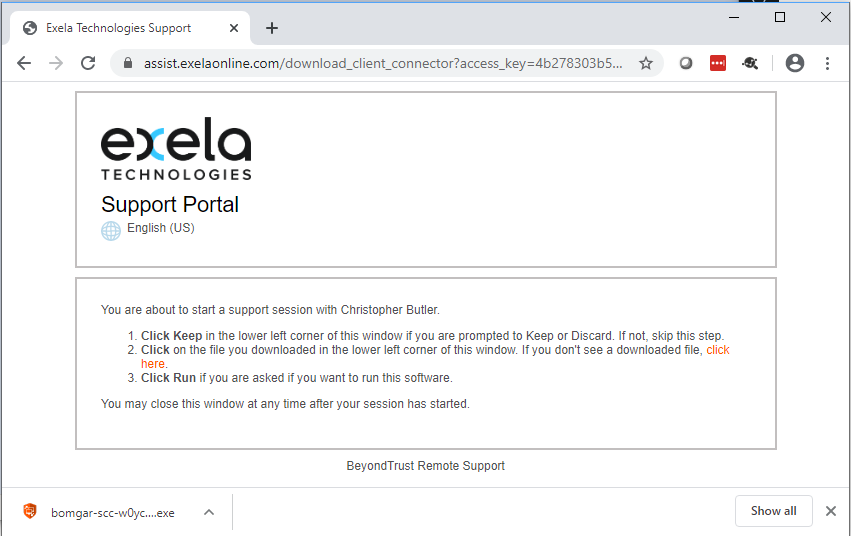

After the End user opens the run application, they will need to Accept the Notice

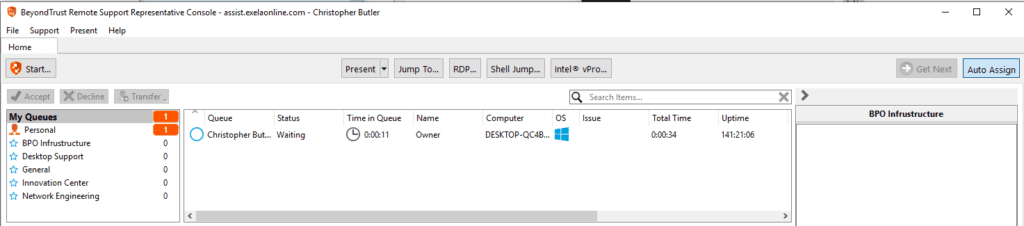
After they hit OK, you will get the prompt in your queue that you have an available support session.
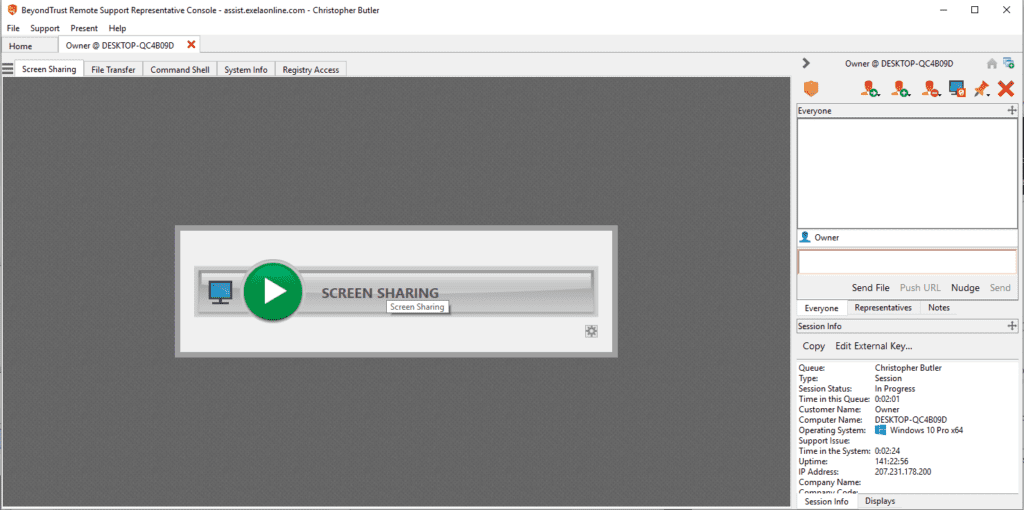
Once the connection Establishes, you will need to start screen sharing. You can also direct Chat with the end user via Bomgar during the session.
Need to Install an app for the End User or access something in an elevated security Level?
You may need to install or access the system context. With Windows 7 and newer the UAC forces. The user to have admin rights and press the shield when the prompt starts. When that happens you loose your screen share. To get around this, you need to elevate your session. Click on the Shield in the Top Right of the Rep Console. There you can enter your Admin credentials for the PC, or prompt the end user if they are an admin.
What Does that give you?
- Ability to see the screen when the UAC prompts are on the screen
- Runs the Bomgar app as a service. This survives during a reboot and when the PC reconnects to the network you are presented with the screen.
Recent Comments